Captivate : Importing JSON data using Javascript
In the last tutorial I showed you how to use an external javascript file to control Captivate variables for output to an HTML5 project. Because some of the methodology required to use Captivate’s Advanced Action WYSISWG editor can be a little laborious to implement (and, to be honest, a little flaky), I tend to use the external Javascript file approach. It allows me to keep all my code in one place instead of having to bounce around Captivate slides to maintain small chunks of slide and object-specific code.
This tutorial is going to be dedicated to showing you how to import data into Captivate – we’re going to use JSON data. In the tutorial I just use an actual .json file, but this could easily be supplied as JSON as a return from an HTTP request from a server.
Prerequisites:
- A Captivate file (preferably the one you used in the previous tutorial).
- A javascript file (again, preferably the one you used in the previous tutorial).
- A .json file. I’ll show you how to format this.
Tools:
- In this tutorial I’m using Captivate 2017 (Version 10.0.0.192).
- I use Sublime Text 3 as my code editor.
- I test and publish HTML5 output to a local server environment. (I use MAMP on a Macintosh, but you could easily use WAMP or any other server environment, including your online LMS).
Steps:
- Maintain the file and folder hierarchy used in the last tutorial.
- Use the same Captivate and javascript files that you created in the previous tutorial.
- Create and format data in a .json file.
- Create Captivate User Variables.
- Load the JSON file and assign the data to Captivate variables.
- Display the data in Text Captions.
File and Folder Architecture
Repeating the information from the previous post for your convenience: In my web root folder (in my case, this is MacHD : Applications : MAMP : htdocs, but on your Windows platform it might be C:/wamp/www ), I have created a prototypes folder, inside of which I keep the Captivate file that I’m working on (prototype-1.cptx), along with an output folder.

This output folder is where my published e-learning module will be published. By default, a folder called prototype-1 will also be published in this location once I am ready to do so.
Please note that the assets folder (a name that I have arbitrarily given to the folder) is at the top level of the output folder. This folder will remain constant, irrespective of any new prototype folders that are created. It’s in this location so that any and every module that’s published can access the Javascript, CSS, data and PHP files easily.
Note the location of cp.js (again, a name that I have arbitrarily given to the Javascript file that we’ll be using).
It’s server file path is http://localhost/prototypes/output/assets/js/cp.js.
It’s physical file path is MacHD : Applications : MAMP : htdocs : prototypes : output : assets : js : cp.js.
In the data folder there is a JSON file, and the css folder contains a CSS file.
Creating the JSON file
Open Sublime Text (or your favourite code editor – or even Notepad) and create a new file. Save it as data.json in the prototypes/output/assets/data folder.
We’re going to create data for the following items:
- Student ID
- First Name
- Last Name
- Project ID
- Project Name
- Project Description
Even though there are built-in Captivate variables for some of these items, some of them work in such a way that their data may only be retrieved, not set dynamically. I’m deciding to use custom made (user-defined) variables instead, which may be dynamically retrieved and set.
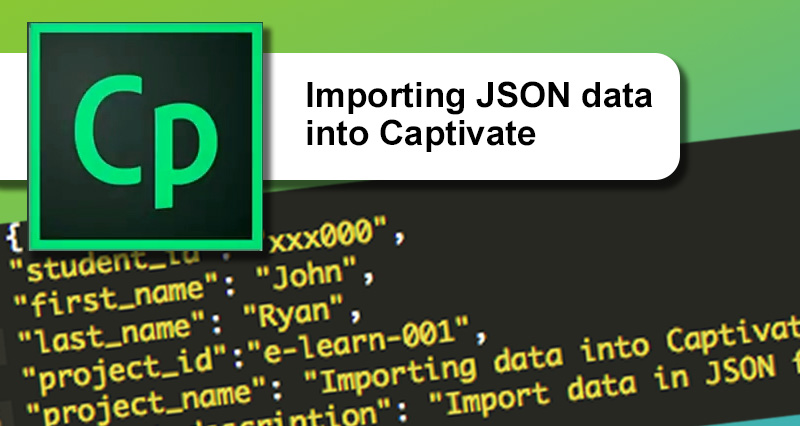
JSON – formatted data.
{
"student_id": "xxx000",
"first_name": "John",
"last_name": "Ryan",
"project_id":"e-learn-001",
"project_name": "Importing data into Captivate",
"project_description": "Import data in JSON format into Captivate and assign to variables",
}
Creating user-defined variables in Captivate.
In the same way as you created user-defined variables in the previous exercise, do the same here. Open your Captivate file. You should note that the Captivate variable names are the same as the names in the JSON file. This is just going to make things easier when we map the data to the variables in the following step.
- Choose Project : Variables, then click the Add New button.
- In the name field, insert the individual variables listed without spaces.
A typical naming convention is to use camelCase.
Set the description too, if you like.

Load the JSON file and assign the data to Captivate variables.
You’ve seen the format of the JSON file – essentially it is a regular data Object with a series of property:value pairs.
Because Captivate’s export to HTML5 option includes the javascript JQuery library, we’re going to use the built-in $getJSON method to load in the JSON data you just created and then hand off the results to be stored in the Captivate Variables you created in the previous step.
Essentially the function gets a request to load data from a path (either a hardcoded .json file path like you created, or the result from a server database request), and then parses the data once it has successfully retrieved it.
We’ll create a function in the cp-loadjson.js file that expects to be sent this file URL, and then make a call to that function in the Captivate frame script, passing the URL.
Initially, we’ll be able to test the success of the data call by tracing the results out into Chrome’s console.
So, let’s get going. Open up cp-loadjson.js in your favourite code editor. You can delete all the code you created in the previous exercise.
Note: If you forgot to do it before, check that you’ve loaded the cp-loadjson.js script on the first frame of your Captivate file by selecting the Actions Tab on the Properties panel, choosing Execute Javascript and appending the script link to your HTML5 output:
$("body").append("");
Inside the quotes, add a link to the javascript file which will be doing all the heavy lifting. Note that it’s positioned outside of your publish folder.

1: Comment your code.
It’s always a great idea to comment your code, so start by defining some basic info about your function:
/* ------------------------------------------ */
/*
Called from: 	SlideEnter script in Captivate
Description: 	Sets up module info
Arguments: 	URL for JSON file
Dependencies: 	none
*/
2: Create the function
Now create the skeleton for the function that will be called from a Captivate frame script.
The console.log method is so that you can check if the function was called successfully, and also the value of the variable that you sent from Captivate.
function initialise(p_datapath) {
    console.log(":: initialise :: "+p_datapath);
}
3: Call the function from Captivate
- Create a new slide in Captivate. Select the slide in the filmstrip column and check the Properties panel.
- Click the Actions tab and check that the On Enter event has No Action assigned to it.
- Select the dropdown menu and choose Execute Javascript.

- Now click the Script Window button to open up a simple editor window. If you’d prefer to do your script editing in an environment with colour coding, line numbers and all the good stuff, feel free to write your code in your favourite editor and just copy and paste in here.
- Type the following text into the script window.
initialise('../assets/data/data.json');
Publish the Captivate project
Test the project by browsing to http://localhost/prototypes/output/prototype-1 (or wherever you have stored the file). Note that you probably won’t be able to adequately test this project unless you’re hosting it on a web server.
Enable Chrome Developer Tools
Once your project is visible in a browser (in this exercise, I’m using Chrome, but you can do this easily in most browsers), right-mouse-click on your page, and choose ‘inspect’ from the drop-down menu.

Chrome Developer Tools
The top left of the console shows you the HTML structure that Captivate creates. At the very end of the code, just inside the closingtag, you’ll see the link to the script that we’re working on right now. In the Console region below, you’ll see the text we output to the console using console.log. With any luck, you’ll see the link to the JSON file we created as well.
Use $getJSON to load the JSON data
Inside the function you just created, call the JQuery built-in $getJSON method, passing it the URL that originally came from the Captivate frame script, and also the function that will process the data.
Just to be sure that we’re successful in getting the data, we’ll output it into the Chrome console as before.
Complete your function as below:
function initialise(p_datapath) {
    console.log(":: initialise :: "+p_datapath);
    // pull info from JSON url
    $.getJSON(
    	p_datapath,
    	function(returnedData){
		$.each(returnedData,function(property,value){
			// output each variable:value pair into the console
			console.log(property+" : "+value);
		});
	});
}
Console log
Check that your console outputs something like this:

Add User Defined variables to Captivate Text Captions
In the same way as you did in the last tutorial, create a text caption, and with your cursor in the field, click the [x] icon and add a User variable.
Add all the variables in the same way. In a moment you’ll understand why I got you to name the Captivate variables the same as the variable names in the JSON data file..
Your second slide should look something like this (I’ve just added labels to the left of the actual variable names) :

Assign data to Captivate variables.
Now that you’ve made sure that the data has loaded, all that remains is a single line of code to complete the project.
Complete your function with this (note the console.log line has been commented out and replaced with a line that grabs the JSON value and assigns it to a Captivate variable of the same name).:
function initialise(p_datapath) {
    console.log(":: initialise :: "+p_datapath);
    // pull info from JSON url
    $.getJSON(
    	p_datapath,
    	function(returnedData){
		$.each(returnedData,function(property,value){
			// output each variable:value pair into the console
			// console.log(property+" : "+value);
			window.cpAPIInterface.setVariableValue(property,value);
		});
	});
}
Publish your project
If you’ve done everything right, your output should look something like this:

 | © 2014 John Ryan Design | All Rights Reserved | 100 percent Australian |